
Tuesday can connect to your Gmail account (this works for Google Workspace accounts, too) and send emails automatically.
How to send email with Gmail
1. Create worksheet
Here you can create or use any existing worksheet that contains email subject, email message of the email you wish to send. We recommend using the default
Personalized Sales Emails template.2. Include email address column
If your worksheet doesn’t already have the person’s email address, here’s how to create it:
Approach 1: Use our data which provides email address for each prospect automatically.
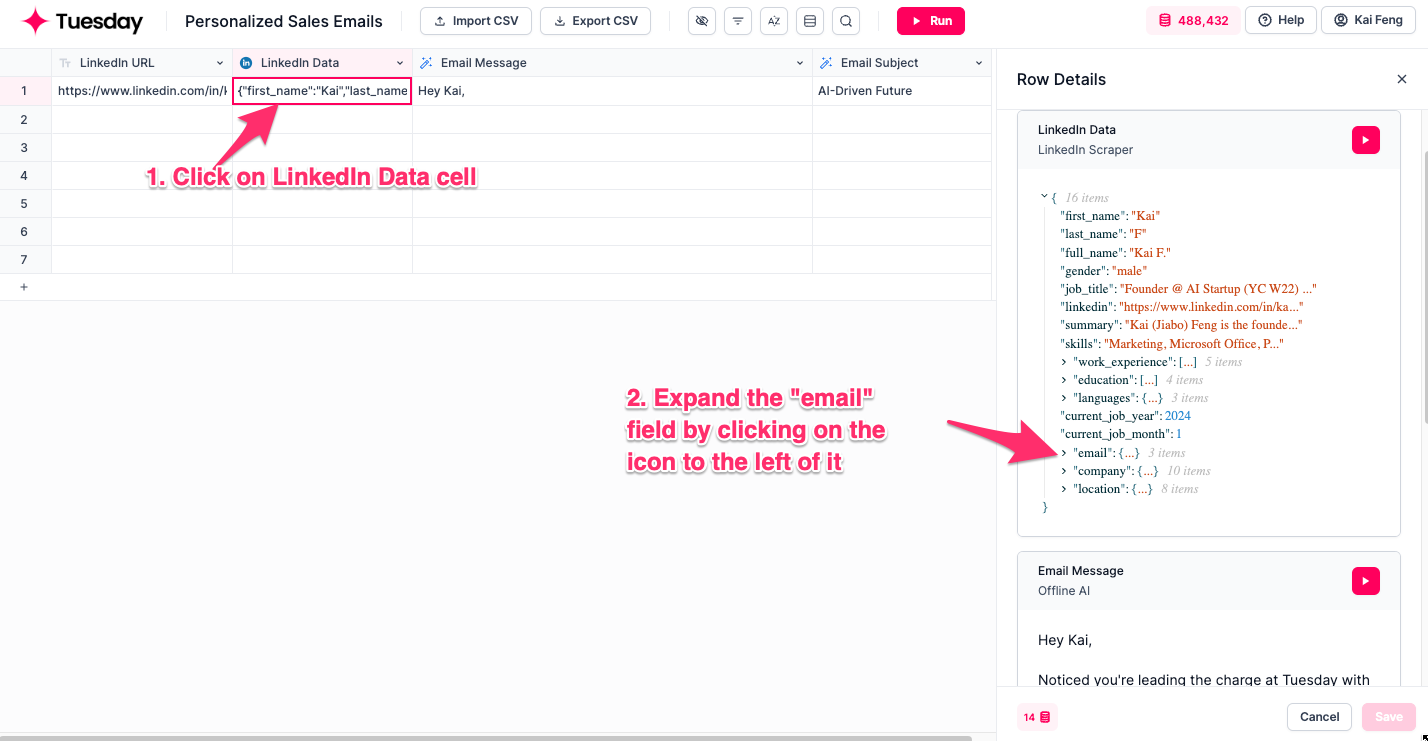
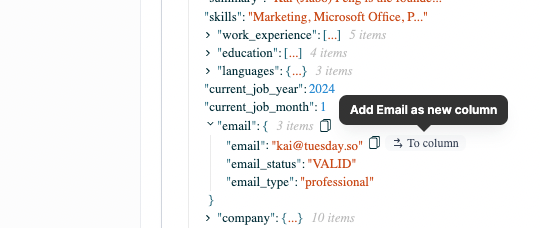
Click on To column button that shows up when you hover mouse on the email text. This will create a new
Email column that contains the person’s email address. Approach 2: Add a new column and name it “Email”, then paste in the email address from your own sources
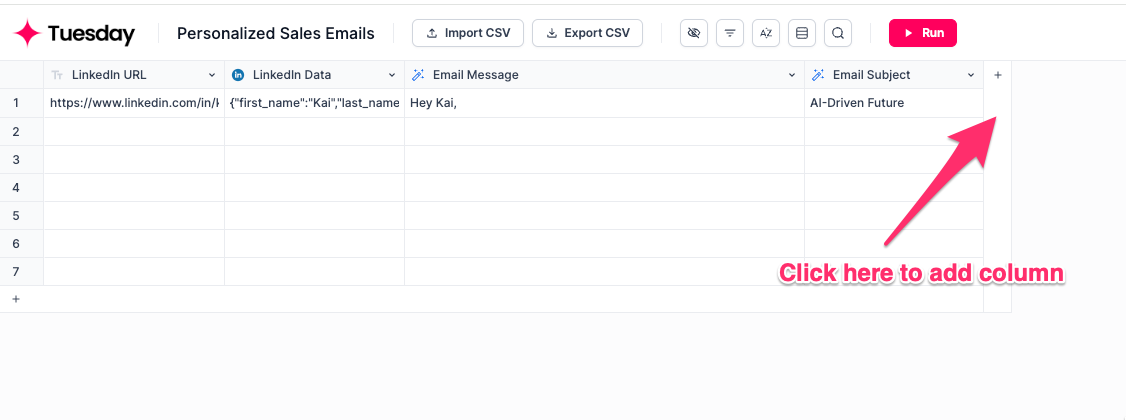
3. Add Gmail (Send Email) as new column
- Add a new column by clicking on the plus sign to the right of the last column.

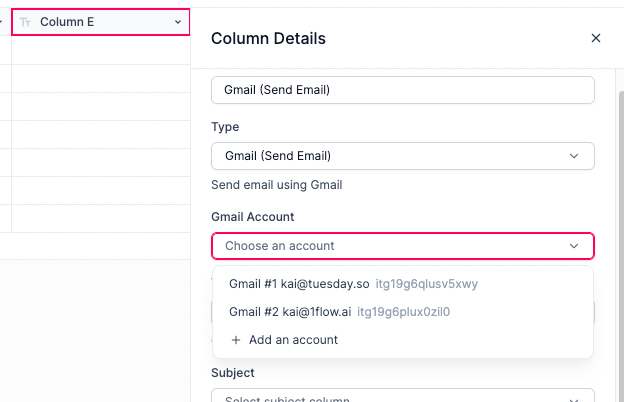
- Select Gmail (Send Email) from the menu on the right:
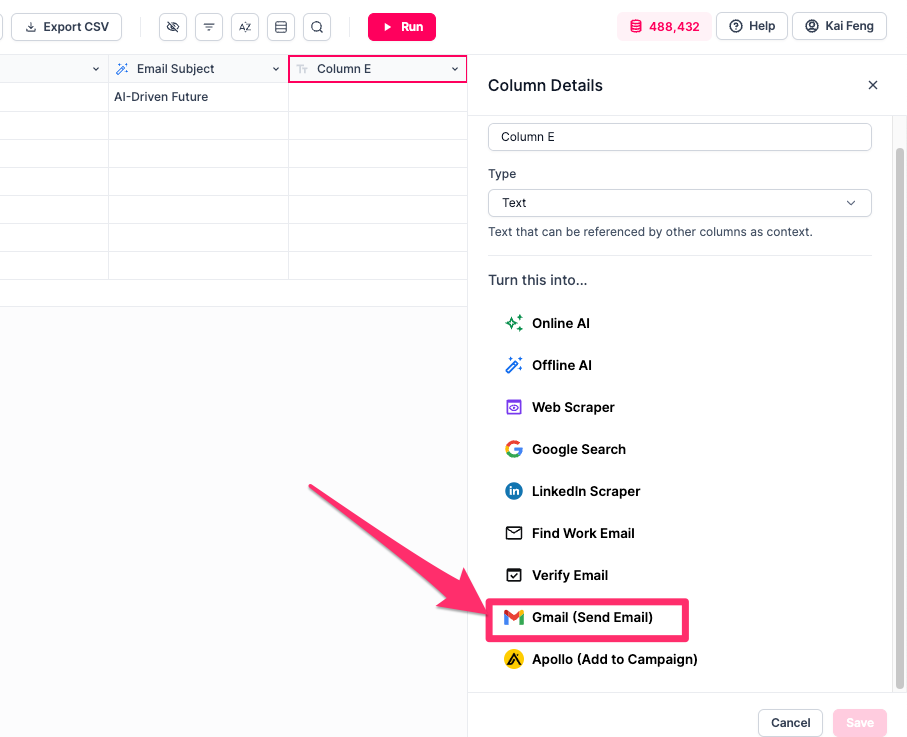
- For the first time using this feature, you’ll need to “Add an account” first and connect your Gmail account.
When you click on “Add an account” you might be redirected to a page that shows warning - unsafe website. There’s nothing to worry about! It’s because Google app review team takes time to review and approve our integration – until that happens, you will see the warning.
To the bottom left of the warning page, you’ll see an “Advanced” link. Click on it and select to proceed to the site. This allows you to continue with the setup.
And yeah, you’ll be safe and sound (despite the scary system warning).
- Next, you need to connect the
To,SubjectandBodycolumns:
Field | Explanation |
To | Connect the email address column. |
Subject | Connect the subject line column. |
Body | Connect the email message column. |
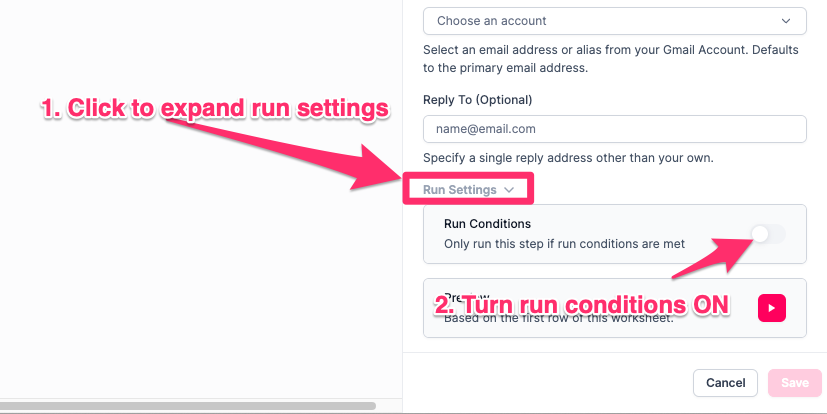
4. Only run if email exists (optional)
As an optional step, you can add advanced run conditions to make sure the email is only sent if a valid email is found and you have the proper message generated. Otherwise, don’t send it!
To do this, click on “Run settings” to expand the menu, and then toggle on Run conditions.
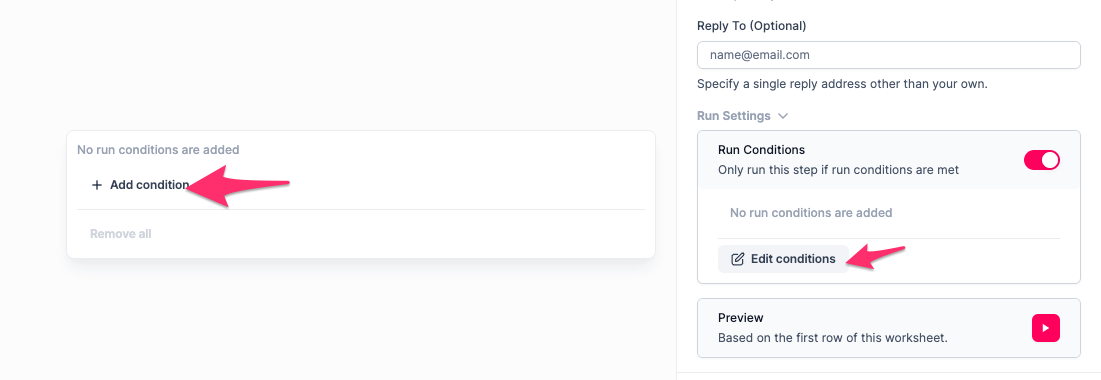
Click on Edit conditions and then Add condition: “Email” field is not empty.
You can also say “Email Message” field is not empty as another safety check.
5. Save your changes
Click on Save button on the bottom of the page to save your changes. Your emails will now be sent automatically on each row’s execution.
Limitations
Please note that you shouldn’t send out more emails than the normal usage allowed for your Gmail account in a day. Typically for personal emails this is ~100 sends per day and ~500 sends per day for business emails.
For more information, see Google results:
how many emails can i send per day in gmail - Google Search
https://www.google.com/search?q=how+many+emails+can+i+send+per+day+in+gmail&oq=how+many+emails+can+I+send+per+da&gs_lcrp=EgZjaHJvbWUqDAgAEAAYFBiHAhiABDIMCAAQABgUGIcCGIAEMgYIARBFGDkyBwgCEAAYgAQyBwgDEAAYgAQyBwgEEAAYgAQyCAgFEAAYFhgeMggIBhAAGBYYHjIICAcQABgWGB4yCAgIEAAYFhgeMggICRAAGBYYHqgCALACAA&sourceid=chrome&ie=UTF-8